How to change guitar strings – step #6 :Attaching the new string to the bridge.
Now the old string is out of the way, we’re ready to attach the new shiny string!
Essentially what we’re doing now is what we just did, but in reverse.
In the case of a steel string acoustic guitar we need to insert the ball-end of the new string into the bridge pin socket and then re-insert the bridge pin to hold it in place.
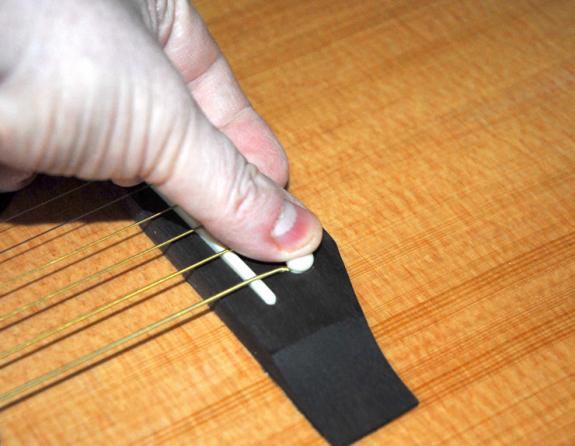
Bridge pins have a tendency to try and pop back out when we re-insert them so it’s a good idea to push it in quite firmly, while also tugging on the string to ensure it’s sitting in its niche.
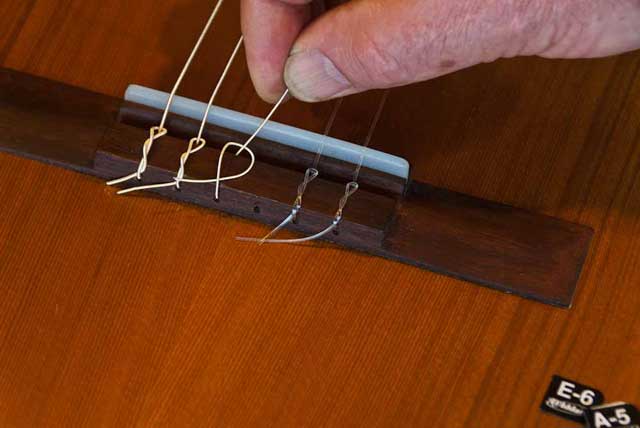
Nylon strings don’t have ball-ends, rather they have eyes on the end (for looping), so if we’re restringing a nylon string guitar we need to thread the other end of the string through the bridge hole and then through the eye.
Unfortunately, not all nylon strings come ‘pre-eyed’. You may have to tie one off yourself if that’s the case. (Which is annoying and fiddly work!)
Important: do NOT attempt to put steel strings onto a nylon string guitar. They are not built to hold that kind of tension and the neck will snap after a few hours!
If it’s an electric guitar we’re re-stringing, we simply need to feed the new string either through the hole in the back of the body if it’s a ‘string though’ model (such as a Stratocaster) or directly through the bridge if it’s a ‘bridge mounted’ model (such as a Les Paul).
Important: make sure you are feeding the right string through the right hole. This is a common mistake made by beginner guitarists with ‘string through’ guitars.
How to change guitar strings – step #8: Disposing of the surplus length.
For reasons we won’t go into here, 99% of the time, guitar strings are longer than they need to be.
We can save ourselves time and effort (and create a neater finish) if we snip off the excess string length that we don’t require.
This is where our pliers come in handy.
Stretch the new string up to where the tuning peg is and add on a hand’s width of surplus string. That is plenty!
While learning how to change guitar strings, we might as well learn the most elegant way to do it, right?
This extra hand’s width of string is what we’re going to use to wind around the tuning peg.
Anything beyond that hand’s width can be trimmed off using our pliers.
If you don’t have pliers then you can leave the surplus on, but it will get in the way and give you some extra work as we start winding the string on.
How to change guitar strings – step #9: Winding the new string onto the tuning peg.
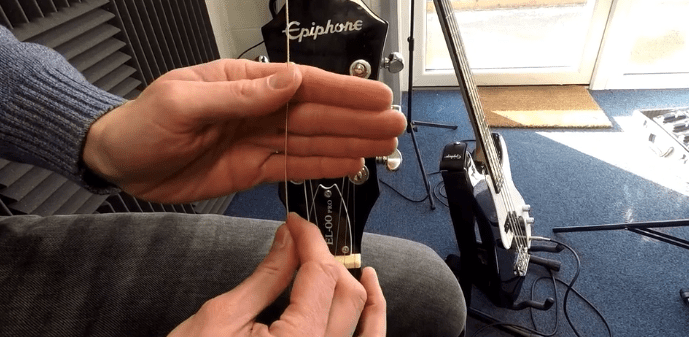
Feed the end of the string through the hole in the tuning peg.
When you start wrapping the string around the peg it will want to unravel (to straighten itself out). In order to stop the string from sliding out and unravelling we need to kink the string into a ‘v’ shape so it will hook securely around the tuning peg.
This means it will be easier and faster to tighten the string (and far less likely to unravel, which can be maddening).
Kinking the string in this way is particularly important for the 1st and 2nd strings (the thinnest two strings) as they are slippy and the ones that are most likely to unravel.

Now wind the string around the tuning peg by hand. (You can use your string-winder in a moment, but the first couple of loops should be done by hand. Make sure the string is TIGHTLY coiled around.
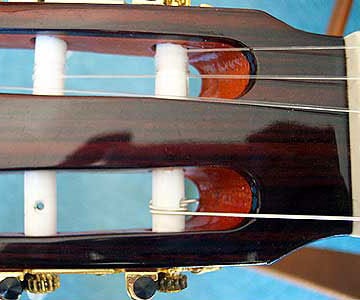
It’s important that you wind the string the right way. As we can see in the above image, the string should always be wound so it ends up running down the middle of the headstock. (Not on the edge of the headstock.)
With nylon string guitars, the tuning pegs are usually horizontal rather than vertical. If that’s the case, the strings should wind over the pegs, not under.
If the string is wound the wrong way, every time you go to tune the string up, it will tune down and vice versa.
Once we’ve wound it round the tuning peg, we need to keep the tension of the string by keeping it pulled taught. If we don’t, it will uncoil itself! We can’t let go of the string until it’s been tightened up quite a lot.
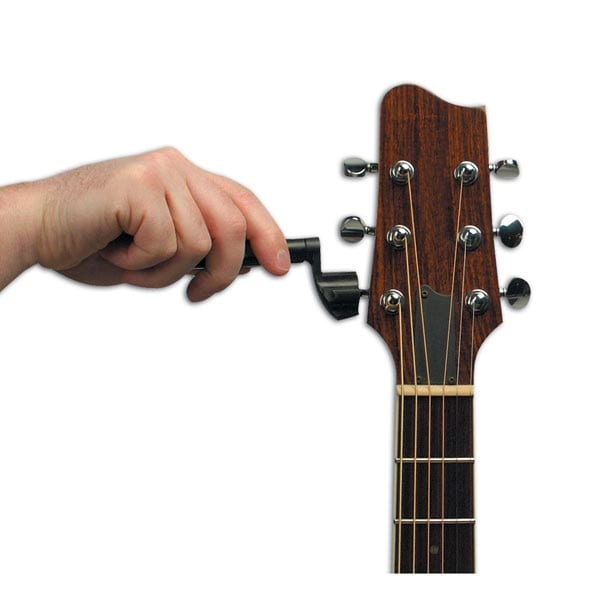
This is where the string-winder comes into play.
If you don’t have a string winder you can wind by hand, but this is time consuming and can be tiring for our thumb and forefingers.
Attach the string winder to the tuning peg and wind it so the string begins to tighten.
Wind the string. Make sure the string is sitting in the correct grooves, at both ends of the guitar. Be careful! The string can easily pop out as you tighten it.

Unfortunately, some guitar bridges don’t have grooves. If this is the case, just space the strings evenly from one another.

Important point: string winders tighten strings very quickly compared to using the thumb and forefinger, so be careful not to overtighten or your string or it will snap!
Over-tightening strings is the no#1 mistake that beginner guitarists make when they’re learning how to change guitar strings.
Strings will snap quickly if you over-tighten them, so keep plucking as you wind and as soon as you hear that the string can make a note you should start using your guitar tuner to perfect the tuning.
How to change guitar strings – step #10: Tuning the new string in.
Now the string is tight enough to play a note, we need to tune it up so it plays the right note.
This is where our tuner comes in. We want to tune our new string up until our tuner says it’s perfect.
This will take longer than it normally does to tune a string because our new string is so much further out of tune.
Whereas we might normally have to only give our tuning peg a slight tweak, with a new string it will likely take quite a few big twists!
Be careful not to overdo it. Tune up carefully, keeping a watchful eye on what the tuner says.

How to change guitar strings – step #11: Stretching the strings to ensure the guitar STAYS in tune.
Once the new string is in tune, you will find that it doesn’t stay in tune for very long.
This is because it still has lots of slack left in it. You will find that every time you strum the string, you’re knocking a little bit of that slack out, causing the string to go out of tune. Again and again!
Most beginner’s have experienced this. Tuning up again and again. It’s awful.
So learn this pro trick…
To prevent this from happening, the new string needs to be stretched. We do this to remove any remaining flex in the string. This means the guitar will STAY in tune.
We need to gently but firmly pull this slack out of the string.
It’s important to stress here: gently but firmly.
- Pull it too hard and it might snap.
- If you don’t pull it hard enough and it won’t remove the slack.
Once that’s done, we can then tune the string back up. And repeat the process.
Stretch. Tune. Stretch. Tune.
You’ll usually need to stretch a new string three times before you find it starts to settle and remains in tune.

Some final important tips…
Here’s a few final points to bear in mind as you learn all about how to change guitar strings.
When to replace all your strings
If one of your guitar strings has broken, then obviously you need to replace that string, but the chances are the other strings are also past their best.
It can be a bit time consuming, but it’s good practice to change all your strings if one of them breaks.
- New guitar strings sound better than old ones, so you don’t want one really good sounding string and five dull sounding strings.
- Also, some guitar shops don’t sell individual strings, so you might have to buy a full pack anyway.
If you start playing lots of shows, you will want to start re-stringing your guitar regularly, not just when strings break.
There are different string ‘gauges’
There are different thicknesses of strings. We call them “gauges”. The best types of strings for beginners are ‘extra light gauge’ strings. These are easier to play and gentler on the fingers.

How often should you change your guitar strings?
- For the gigging professional: Every day.
- For the occasional live performer: Every 4 weeks or before every gig. (Whichever happens first.)
- For the average home player: Once every 6-8 weeks is fine.
- For someone who hardly ever picks up the guitar: Once every 6 months is fine.
No one who owns a guitar should ever have the same set of strings on their guitar for more than a year. Strings corrode quickly. The sound they make becomes dull. They turn orange, then brown. Yuck!
Worst of all, it is hugely demotivating when your guitar sounds bad. It stops you wanting to play and this is terrible. Keep your strings bright and sharp, change them regularly and stay clean and sound musical!
Changing your strings is a regular and frequent piece of maintenance
When you think about how to change guitar strings, the best way to frame it in your mind is like this: A car needs fuel to work. And just as you must refuel your car regularly, your guitar needs to be refuelled too. You refuel your guitar by restringing it!

In the beginning, change your strings slowly
For the beginner, changing guitar strings takes time and patience. It’s quite a chore. But you will get faster and faster.
After a little while you will be able to change all your guitar strings in around 5 minutes.
As you get better at it, you will get quicker at it, but it’s important not to rush when you’re first getting to grips with it, otherwise you’ll make mistakes and get frustrated.
Set aside plenty of time to re-string and make sure you have any relevant tools on hand. It makes everything much easier.
What Type of Guitarist Are You?
Take our 60-second quiz & get your results: Take The Quiz
Join the world's best online guitar school 🌎
- Get your own personalised guitar learning plan (customised just for YOU).
- World-class online guitar courses. Learn at your own pace.
- Community Campus & Learning Forum - A friendly community! Connect with our team & students. 😊
- Beginner Song library with chordsheets, tabs and tips. (Songs suitable for all levels!)
- Regular live streams, seminars and Q&A sessions - Learn from world-class guitar educators. Get all your questions answered!
Click here to learn more about National Guitar Academy membership ![]()
Cool Guitar T-shirts 😎
Look cooler! Check out our merch: Click here to see our merch store
Want free guitar tips and video lessons delivered to your inbox?
Join over 250,000 other guitar learners and subscribe to our guitar-tips-by-email service. (It's free.)
We'll send you a series of lessons that will move you to the next level of your guitar journey.
Learn how everything fits together quickly, easily and effectively. We share ninja tips (for instant fun!) but also timeless fundamentals that will deepen your understanding.

Popular Lessons
How To Learn Guitar: An 11-Step Programme For Beginners
How To Choose The Perfect Beginner Guitar
More Cool Guitar Stuff
Learn about National Guitar Academy: About Us
Visit our YouTube channel for fun guitar videos.
Join us on Facebook for daily guitar tips.
Listen to our Learn Guitar Podcast for rapid guitar progress.
Check out our free chord lessons.
Get our best guitar tips & videos